Page 12 - How to Make Snowshoes
Published by Ronald Caplan on 1973/1/1 (9167 reads)

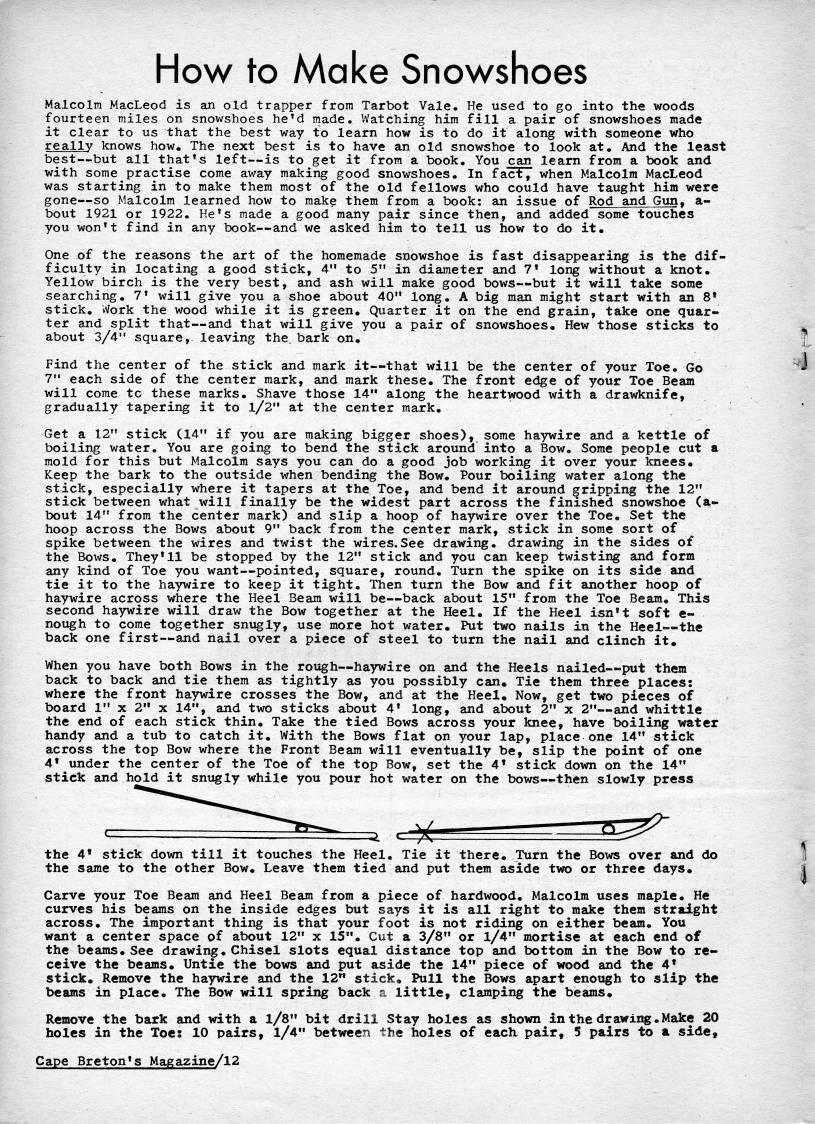
How to Make Snowshoes Malcolm MacLeod is an old trapper from Tarbot Vale. He used to go into the woods fourteen miles on snowshoes he'd made. Watching him fill a pair of snowshoes made it clear to us that the best way to learn how is to do it along with someone who really knows how. The next best is to have an old snowshoe to look at. And the least best • but all that's left • is to get it from a book. You can learn from a book and with some practise come away making good snowshoes. In fact, when Malcolm MacLeod was starting in to make them most of the old fellows who could have taught him were gone • so Malcolm learned how to make them from a book: an issue of Rod and Gun, a- bout 1921 or 1922. He's made a good many pair since then, and added some touches you won't find in any book • and we asked him to tell us how to do it. One of the reasons the art of the homemade snowshoe is fast disappearing is the dif? ficulty in locating a good stick, 4" to 5" in diameter and 7' long without a knot. Yellow birch is the very best, and ash will make good bows • but it will take some searching. 7' will give you a shoe about 40" long. A big man might start with an 8' stick. Work the wood while it is green. Quarter it on the end grain, take one quar? ter and split that • and that will give you a pair of snowshoes. Hew those sticks to about 3/4" square, leaving the. bark on. Find the center of the stick and mark it • that will be the center of your Toe. Go 7" each side of the center mark, and mark these. The front edge of your Toe Beam will come tc these marks. Shave those 14" along the heartwood with a drawknife, gradually tapering it to l/2" at the center mark. Get a 12" stick (14" if you are making bigger shoes), some haywire and a kettle of boiling water. You are going to bend the stick aronnd into a Bow. Some people cut a mold for this but Malcolm says you can do a good job working it over your knees. Keep the bark to the outside when bending the Bow. Pour boiling water along the stick, especially where it tapers at the Toe, and bend it around gripping the 12" stick between what will finally be the widest part across the finished snowshoe (a- bout 14" from the center mark) and slip a hoop of haywire over the Toe. Set the hoop across the Bows about 9" back from the center mark, stick in some sort of spike between the wires and twist the wires.See drawing, drawing in the sides of the Bows. They'll be stopped by the 12" stick and you can keep twisting and form any kind of Toe you want • pointed, square, round. Turn the spike on its side and tie it to the haywire to keep it tight. Then turn the Bow and fit another hoop of haywire across where the Heel Beam will be • back about 15" from the Toe Beam. This second haywire will draw the Bow together at the Heel. If the Heel isn't soft e- nough to come together snugly, use more hot water. Put two nails in the Heel • the back one first • and nail over a piece of steel to turn the nail and clinch it. When you have both Bows in the rough • haywire on and the Heels nailed • put them back to back and tie them as tightly as you possibly can. Tie them three places: where the front haywire crosses the Bow, and at the Heel. Now, get two pieces of board 1" x 2" x 14", and two sticks about 4' long, and about 2" x 2" • and whittle the end of each stick thin. Take the tied Bows across your knee, have boiling water handy and a tub to catch it. With the Bows flat on your lap, place one 14" stick across the top Bow where the Front Beam will eventually be, slip the point of one 4?? under the center of the Toe of the top Bow, set the 4?? stick down on the 14" stick and hold it snugly while you pour hot water on the bows • then slowly press the 4' stick down till it touches the Heel. Tie it there. Turn the Bows over and do the same to the other Bow. Leave them tied and put them aside two or three days. Carve your Toe Beam and Heel Beam from a piece of hardwood. Malcolm uses maple. He curves his beams on the inside edges but says it is all right to make them straight across. The important thing is that your foot is not riding on either beam. You want a center space of about 12" x 15". Cut a 3/8" or 1/4" mortise at each end of the beams. See drawing. Chisel slots equal distance top and bottom in the Bow to re? ceive the beams. Untie the bows and put aside the 14" piece of wood and the 4' stick. Remove the haywire and the 12" stick. Pull the Bows apart enough to slip the beams in place. The Bow will spring back a little, clamping the beams. Remove the bark and with a l/8" bit drill Stay holes as shown in the drawing.Make 20 holes in the Toe: 10 pairs, 1/4" between the holes of each pair, 5 pairs to a side. Cape Breton's Magazine/12


Adobe Acrobat Reader is required to the PDF version of this content. Click here to download and install the Acrobat plugin